Topics In Demand
Notification
New

No notification found.

Registering Event Listeners In Hyperledger Fabric

October 19, 2021

477

0

The Hyperledger Fabric platform provides three ways to get the status of a committed transaction on the peer. Those are:

  • By registering a transaction event
  • By registering the chaincode event
  • By registering a block event

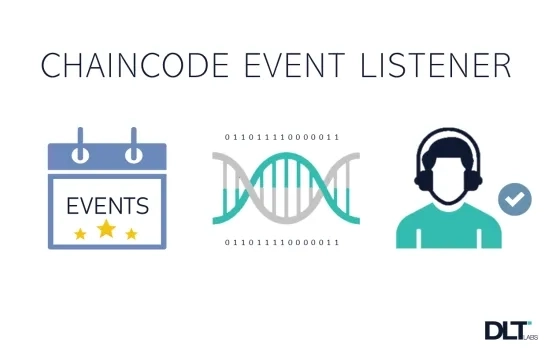
In this article, we will see how to get transaction status using ‘chaincode event listener’. With a chaincode event listener, we can get the transaction status from the peer. The advantage of using a chaincode event listener is that we can set custom events in chaincode instead of using the built-in ‘transaction event’ and ‘block event’ listeners. And we can also pass payload in the custom events while committing the transaction on the peer.

For registering chaincode event listener, first set an event in chaincode and then register chaincode event listener, which is responsible to get committed transactions’ statuses from the peer and payloads which are set in events.

Prerequisites

Step: 1

In this step, first, we will see how to set events in chaincode. Chaincode is responsible to set events with ‘setEvent’ method on the response to the proposal which is included as part of a transaction. The event will be available in the committed block on the peer within the transaction regardless of the validity of the transaction.

In the below chaincode, we set an event with the ‘setEvent’ method, which assumes two arguments:

  1. First is the event’s name;
  2. Second is the value that you want to set in this event. Make sure the value which you want to set is always in a buffer since that is the type of argument required.

In the below chaincode, we set an event inside invoke() function just before the ‘shim.success’ method call, but the user also can set events in any other function of the chaincode.

const shim = require(‘fabric-shim’);
const util = require(‘util’);
const uuid = require(‘uuid’);let Chaincode = class { async Init(stub) {
 console.info(‘=========== Instantiated chaincode ===========’);
 return shim.success();
 } async Invoke(stub) {
 let ret = stub.getFunctionAndParameters();
 console.info(ret); let method = this[ret.fcn];
 if (!method) {
 console.error(‘no function of name:’ + ret.fcn + ‘ found’);
 throw new Error(‘Received unknown function ‘ + ret.fcn + ‘ invocation’);
 }
 try {
 let txId = uuid.v4();
 let payload = await method(stub, ret.params);
 
 console.log(“==== SETTING AN EVENT ====”);// HERE I SET UNIQUE ID BUT USER CAN SET ANY DATA ACCORDING TO THEIR REQUIREMENT
 stub.setEvent(“company-event”,Buffer.from(JSON.stringify([txId])));
 console.log(“==== EVENT SUCCESSFULLY SET ====”);
 
 return shim.success(payload);
 } catch (err) {
 console.log(err);
 return shim.error(err);
 }
 }
 
 
 async queryCompany(stub, args) {
 if (args.length != 1) {
 throw new Error(‘Incorrect number of arguments. Expecting ComReg ex: COM01’);
 }
 let comReg = args[0]; let comAsBytes = await stub.getState(comReg); //get the car from chaincode state
 if (!comAsBytes || comAsBytes.toString().length <= 0) {
 throw new Error(comReg + ‘ does not exist: ‘);
 }
 console.log(comAsBytes.toString());
 return comAsBytes;
 }
 
 
 async createCompany(stub, args) {
 console.info(‘============= START : Create Company ===========’);
 if (args.length != 5) {
 throw new Error(‘Incorrect number of arguments. Expecting 5’);
 } var company = {
 docType: ‘Company’,
 comName: args[1],
 address: args[2],
 gst_num: args[3]
 }; await stub.putState(args[0], Buffer.from(JSON.stringify(company)));
 console.info(‘============= END : Create Company ===========’);
 }
 
};shim.start(new Chaincode());

Step: 2

Before registering event listener we need an eventHub object. So first we create the eventHub object. To do this we need some important information like:

  • Peer URL eg.: “grpc://localhost:7051”
  • User or Admin credential
  • Store path where user and admin credential exists.

The below code is responsible to create eventHub object.

const path = require(‘path’);
const Fabric_Client = require(‘fabric-client’);
const Promise = require(‘bluebird’);// channel name where chaincode installed
const channelName = “mychannel”;
// peer URL which emits events
const peerUrl = “grpc://localhost:7051”;
// store path where user’s signing credential exist// user will use own store path
const store_path = “”;prepareEventHubConnection() {
 let eventHub;
 const fabric_client = new Fabric_Client();
 const channel = fabric_client.newChannel(channelName);
 const peer = fabric_client.newPeer(peerUrl);
 return Promise.resolve(store_path)
 .then((store_path)=>{
 return Fabric_Client.newDefaultKeyValueStore({path: store_path});
 })
 .then((state_store) => {
 fabric_client.setStateStore(state_store);
 const crypto_suite = Fabric_Client.newCryptoSuite();
 const crypto_store = Fabric_Client.newCryptoKeyStore({path: store_path});
 crypto_suite.setCryptoKeyStore(crypto_store);
 fabric_client.setCryptoSuite(crypto_suite);
 return fabric_client.getUserContext(‘admin’, true);
 })
 .then((user_from_store) => {
 if (user_from_store && user_from_store.isEnrolled()) {
 eventHub = channel.newChannelEventHub(peer);// ###############################################// ###### HERE EVENTHUB OBJECT IS READY #####// ###############################################
 return eventHub;
 } else {
 console.error(“ERROR :: CARD NOT FOUND”);
 return Promise.reject(“CardNotFound”);
 }
 }).catch((err)=>{
 console.error(“ERROR :: “,err);
 //Handle all error here
 });
 }

Step: 3

Now we register a chaincode event listener with the help of the eventHub object which was created in step 2 and the “registerChaincodeEvent” method. And we need some information like:

  • Chaincode name
  • Event name (which is previously set in chaincode)

The below code is responsible to register chaincode event listener.

eventHub.registerChaincodeEvent(chaincode, eventName,(onEvent, block, txHash, status)=>{
 let payloadData = onEvent.payload.toString();
 payloadData = JSON.parse(payloadData);// ###################################################// ###### HERE YOU CAN GET ALL COMMITTED EVENTS ######// ###################################################console.log(“ NEW EVENT ARRIVED WITH PAYLOAD => “,payloadData);
},(err)=>{
 console.error(“ERROR :: “,err);
});eventHub.connect({full_block: true},(err,status)=>{
 if(err) {
 console.error(“ERROR :: “,err);
 }});

After we have successfully registered chaincode event listener, we get some information in a callback function which is:

  • Event: which is set by the chaincode
  • Block Number: committed block number on peer
  • Transaction Hash: unique transaction Id
  • Transaction Status: status of the transaction

The payload which is set by the chaincode will be available in the onEvent object.

If the user wants to listen to events from a specific block, they can add options like ‘startBlock’:

eventHub.registerChaincodeEvent(chaincode, eventName,(onEvent, block, txHash, status)=>{console.log(“EVENT”);},(err)=>{console.error(“ERROR :: “,err);},{startBlock : “BLOCK NUMBER FROM WHERE USER WANTS TO LISTEN to THE TRANSACTION”});

I hope you will find this walkthrough helpful the next time you are looking for a more fully featured way to obtain the status of a committed transaction in Hyperledger Fabric.

Hyperledger Fabric is a project hosted by The Linux Foundation® and Hyperledger is its registered trademark. Node.js is a registered trademark of Joyent, Inc.

Author — Ankur Jaiswal, DLT Labs


That the contents of third-party articles/blogs published here on the website, and the interpretation of all information in the article/blogs such as data, maps, numbers, opinions etc. displayed in the article/blogs and views or the opinions expressed within the content are solely of the author's; and do not reflect the opinions and beliefs of NASSCOM or its affiliates in any manner. NASSCOM does not take any liability w.r.t. content in any manner and will not be liable in any manner whatsoever for any kind of liability arising out of any act, error or omission. The contents of third-party article/blogs published, are provided solely as convenience; and the presence of these articles/blogs should not, under any circumstances, be considered as an endorsement of the contents by NASSCOM in any manner; and if you chose to access these articles/blogs , you do so at your own risk.


DLT Labs™ is a global leader in the development and delivery of enterprise blockchain technologies and solutions, as well as a pioneer in the creation and implementation of standards for application development. With a deep track record in innovation and one of the world's largest pools of highly experienced blockchain experts, DLT Labs™ enables the transformation and innovation of complex multi-stakeholder processes.

© Copyright nasscom. All Rights Reserved.